Seedgrade Tools
Master every tool in Seedgrade for DaVinci Resolve. Learn how to create stunning color grades with our comprehensive guide.
Presets
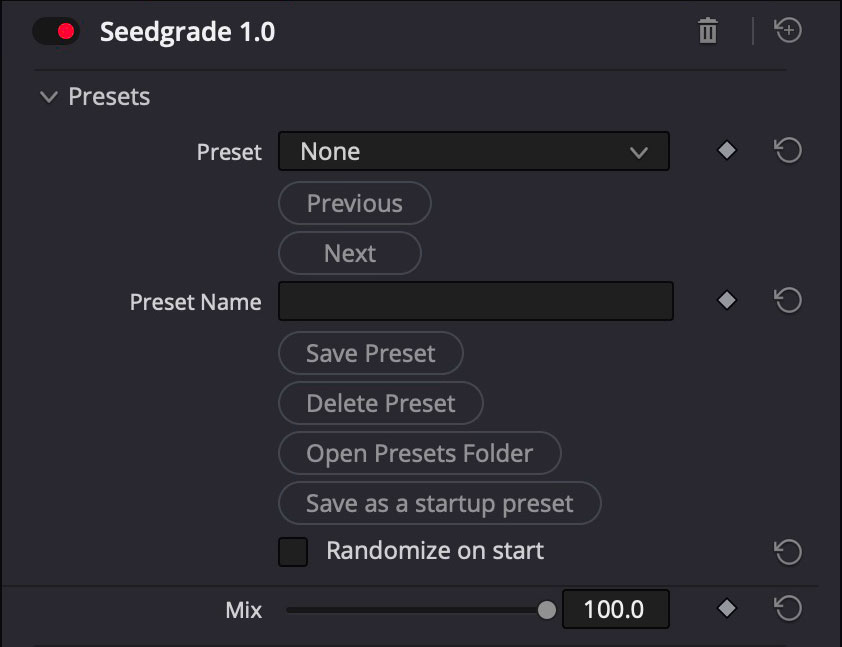
The Presets panel is where you store and recall entire Seedgrade looks. Choose an existing preset from the drop-down, step through saved looks with Previous/Next, or type a name and hit Save Preset to capture the current settings. Delete Preset removes unwanted looks and Open Presets Folder jumps straight to the preset files for backup or sharing. Enable Randomize on start when you want the effect to boot with a different look every time. Use this module whenever you need fast look development, client-specific presets, or a reliable baseline to return to after experimenting.
Navigation
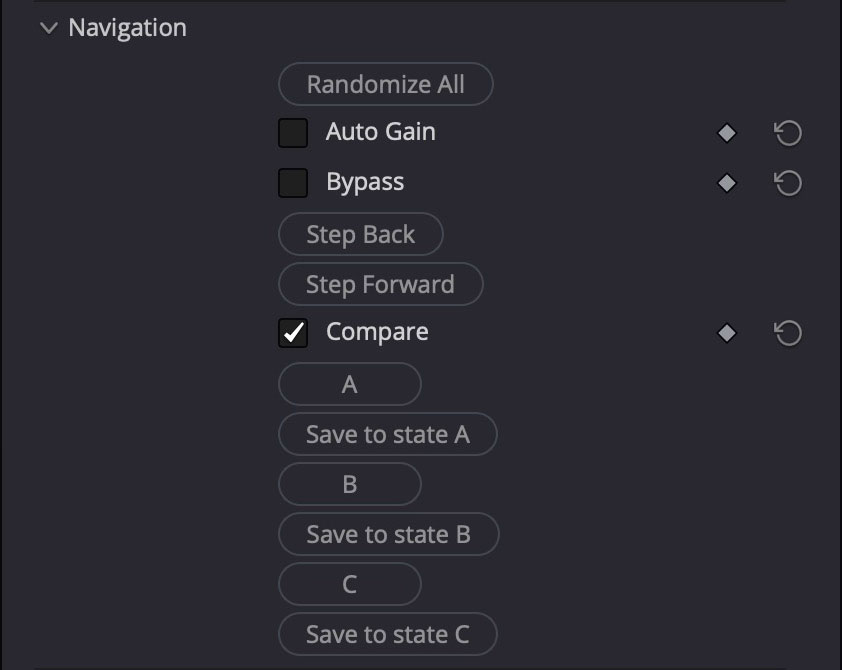
Navigation houses the utility switches for testing variations without touching your saved preset. Randomize All shuffles every parameter that is marked randomizable, Auto Gain keeps the overall output level consistent, and Bypass lets you A/B against the original clip. Step Back/Forward browse through the random history, while Compare toggles between stored states. Use the A/B/C memories to capture three distinct grades, then flip between them instantly for client reviews or creative decisions.
Main Grading
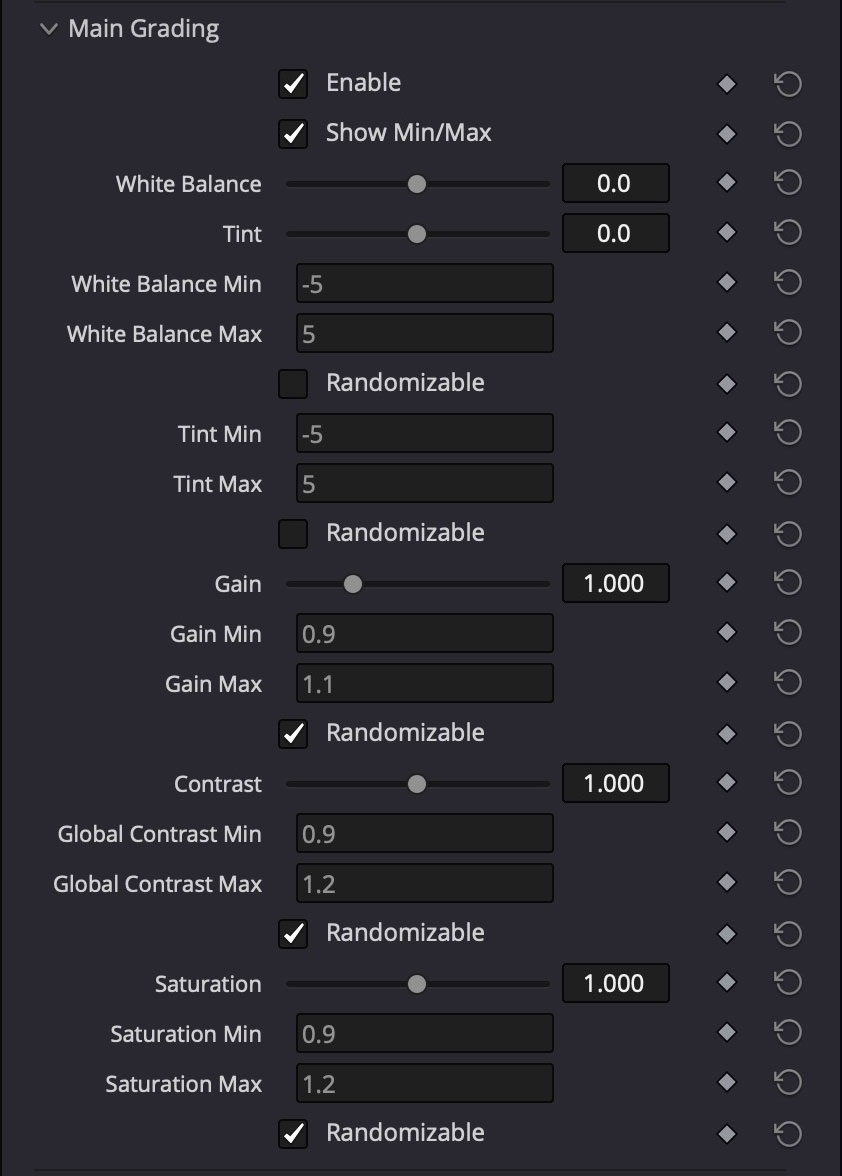
Main Grading is the global correction stage. Enable it to unlock white balance, tint, gain, contrast, and saturation controls with precise min/max limits. Mark any range as Randomizable to let Seedgrade explore new looks inside the boundaries you set—perfect for rapid ideation that still respects your exposure or color constraints. Use this section to lock in the overall feel of the shot before layering stylized modules on top.
Teal and Orange
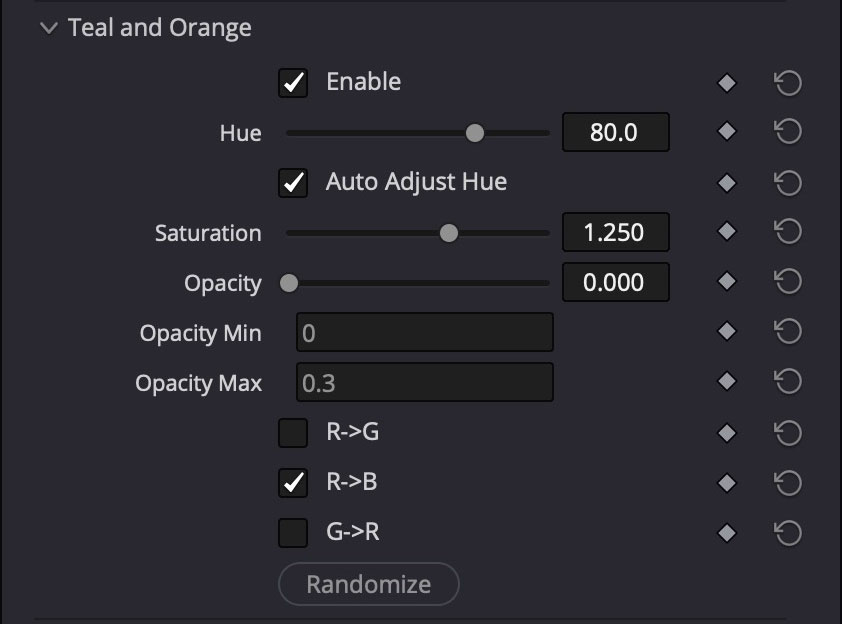
The Teal and Orange block applies a cinematic complementary push between warm skin tones and cool backgrounds. Tune Hue to define the warm axis, let Auto Adjust Hue keep it centered on detected skintones, and drive the effect with Saturation and Opacity. The per-channel routing toggles (R->G, R->B, G->R) decide which color channels receive the teal versus orange bias. This is your one-click route to blockbuster palettes or subtle warm/cool separation.
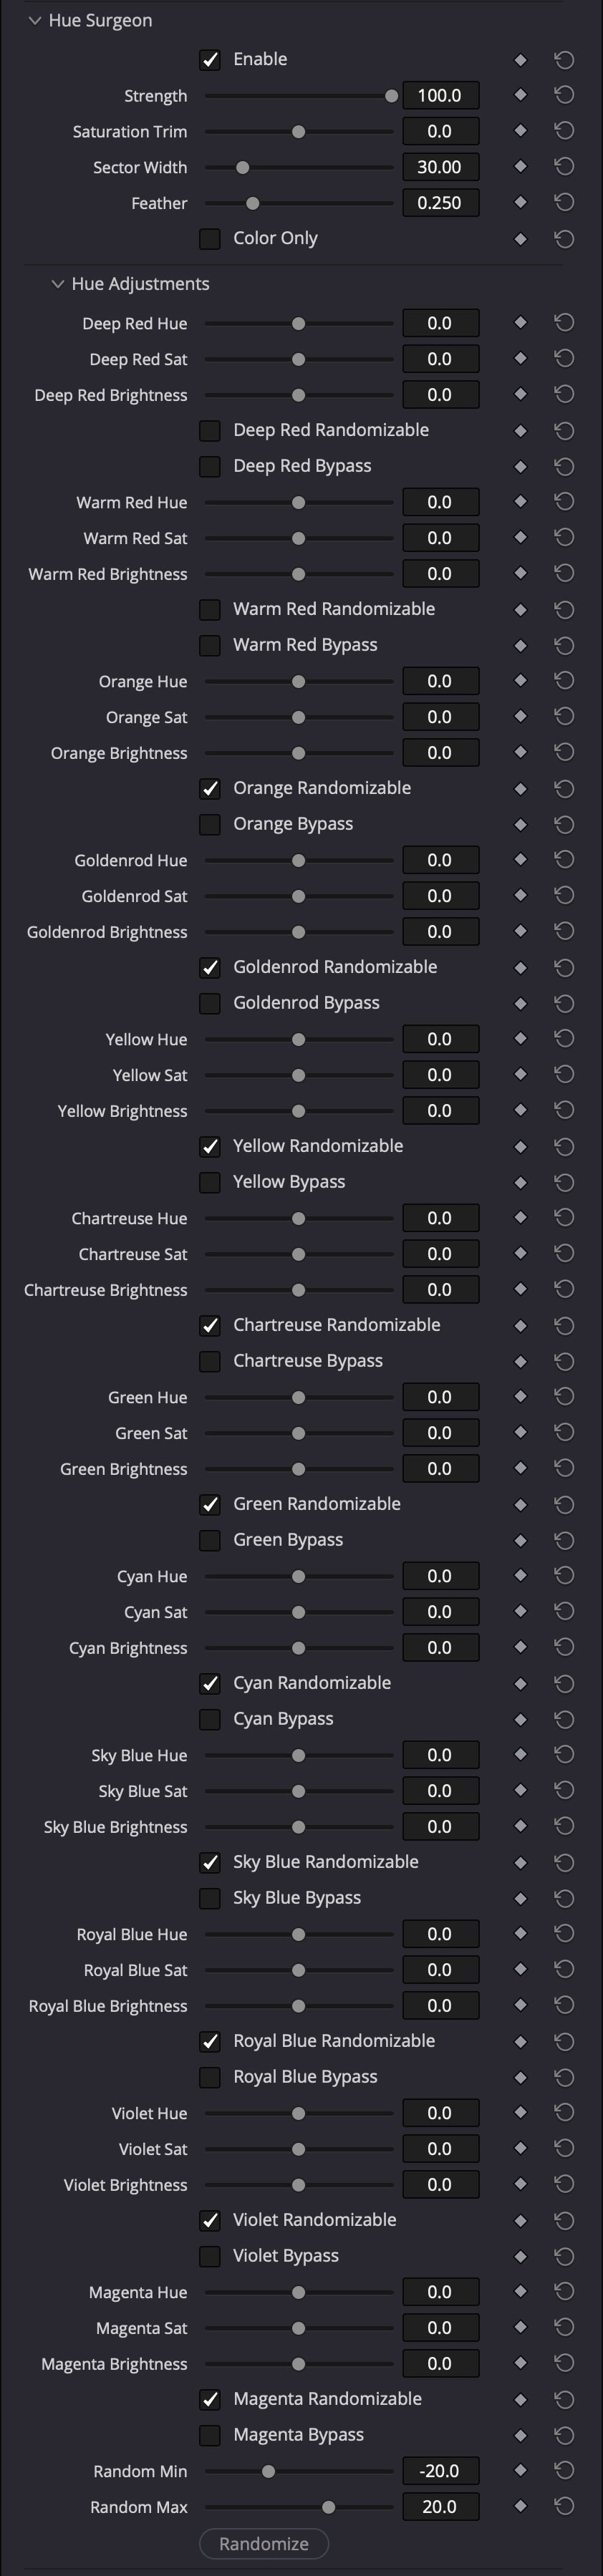
Hue Surgeon
Hue Surgeon is the precision tool for manipulating individual color families. Each swatch (Deep Red, Warm Red, Orange, up through Magenta) gets independent hue and brightness trims, plus optional randomization and bypass flags. Strength, Saturation Trim, Sector Width, and Feather define how aggressively the adjustments grab pixels. Use this panel when you must isolate skies, greenery, wardrobe, or product colors without affecting the rest of the image—ideal for matching brand guidelines or balancing multi-camera shoots.
Gradient Controls
Gradient Controls lets you overlay directional washes or vignettes without leaving the plugin. Choose the Gradient Angle, set opacity limits, and pick two colors for the blend. Because the gradient amount can be randomized within a Min/Max window, you can quickly iterate on sky burns, edge glow, or duotone looks that still respect your composition. Turn it on for stylized transitions, title beds, or to guide viewer focus inside a frame.

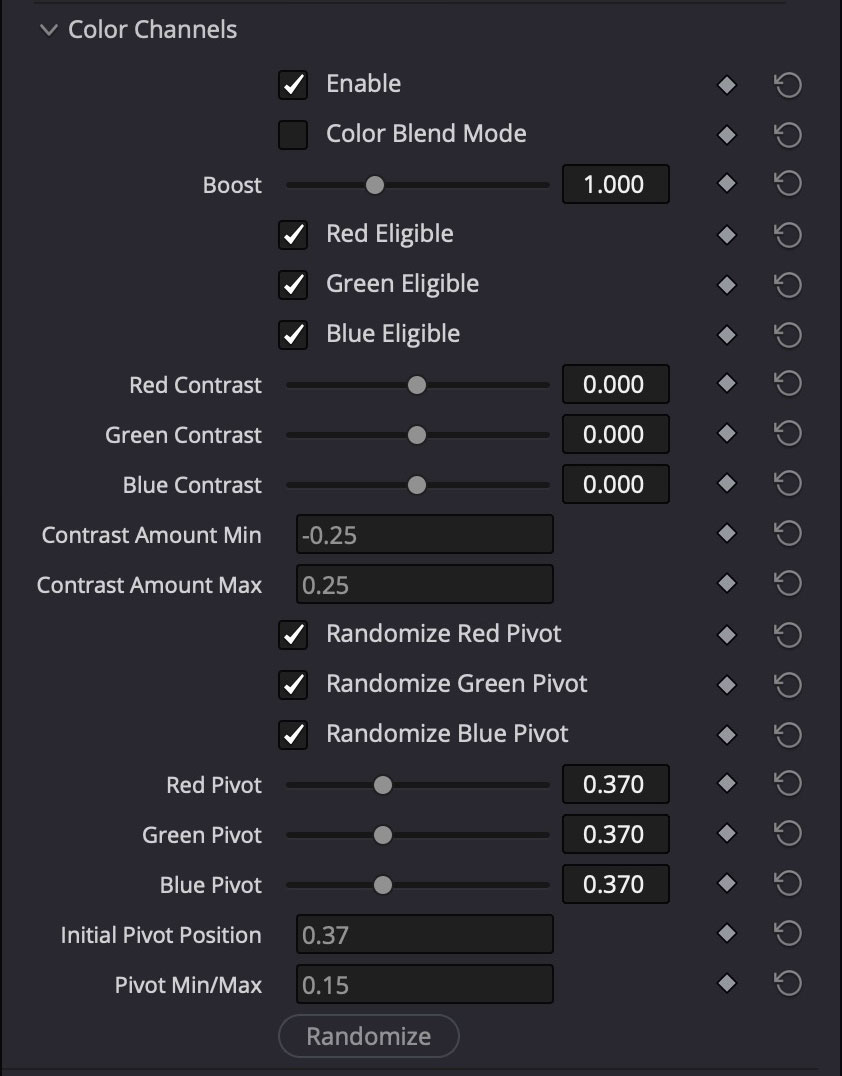
Color Channels
Color Channels focuses on per-channel contrast sculpting. Boost sets the global strength while the Red/Green/Blue eligibility toggles decide which channels participate. Use the individual contrast sliders to emphasize or relax color-specific detail, then define min/max ranges and randomized pivots to let Seedgrade search for tasteful channel curves automatically. Perfect for correcting color cross-talk, recreating analog channel mixing, or building chroma separation effects.
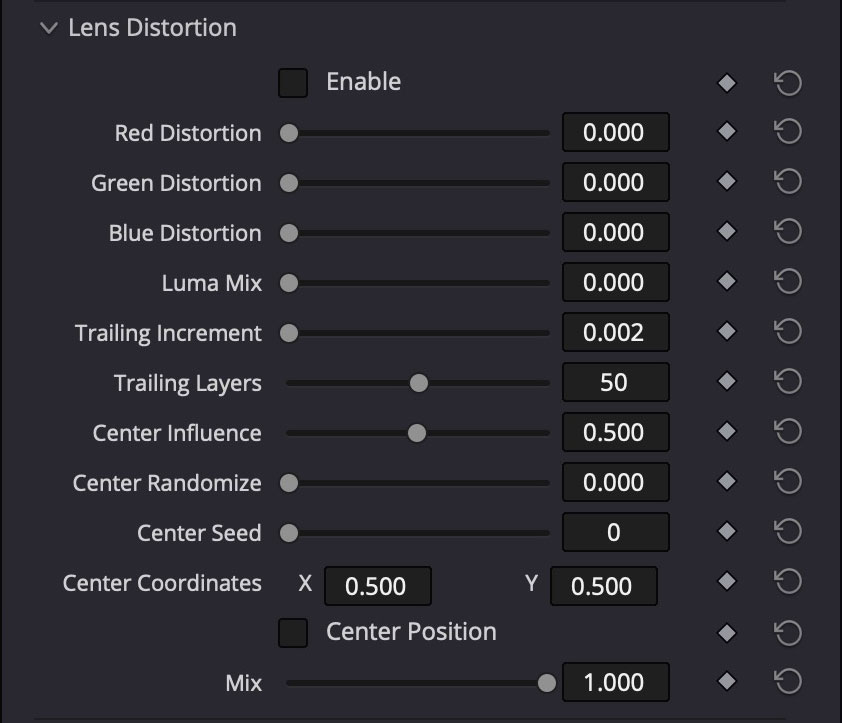
Lens Distortion
Lens Distortion emulates chromatic aberration, trailing echoes, and off-axis stretching. Individually bias red, green, and blue channels, mix in luma-only distortion, and control how many trailing layers accumulate. Center Influence, Center Randomize, and Center Coordinates determine where the distortion originates—great for mimicking anamorphic glass, glitch passes, or focus falloff. Use Mix to dial in anything from subtle realism to stylized prismatic smears.
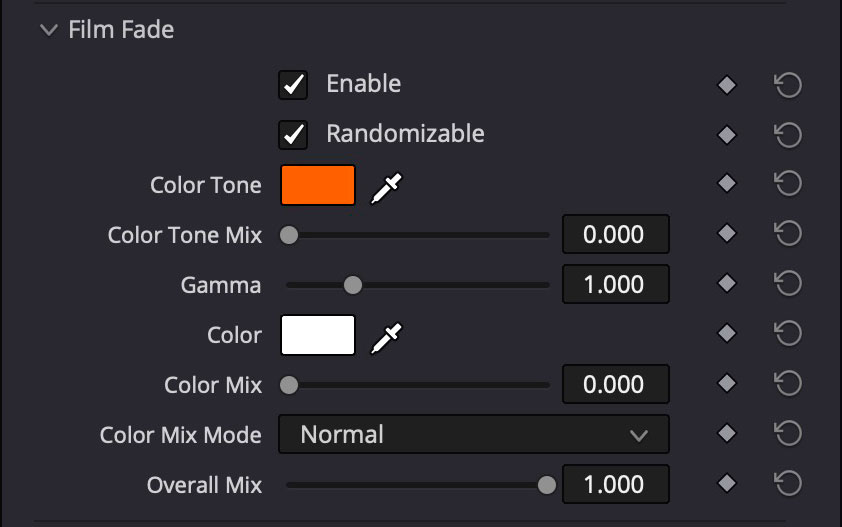
Film Fade
Film Fade softens the grade with vintage-style wash controls. Pick a Color Tone for the fade, adjust how strongly it mixes, then use Gamma and the secondary Color/Color Mix to balance lifted blacks with highlight roll-off. Because the block is randomizable, you can create lightly faded dailies, nostalgic flashbacks, or consistent scene transitions without manually rebuilding curves each time. Finish with Overall Mix to blend the effect into the rest of the stack.
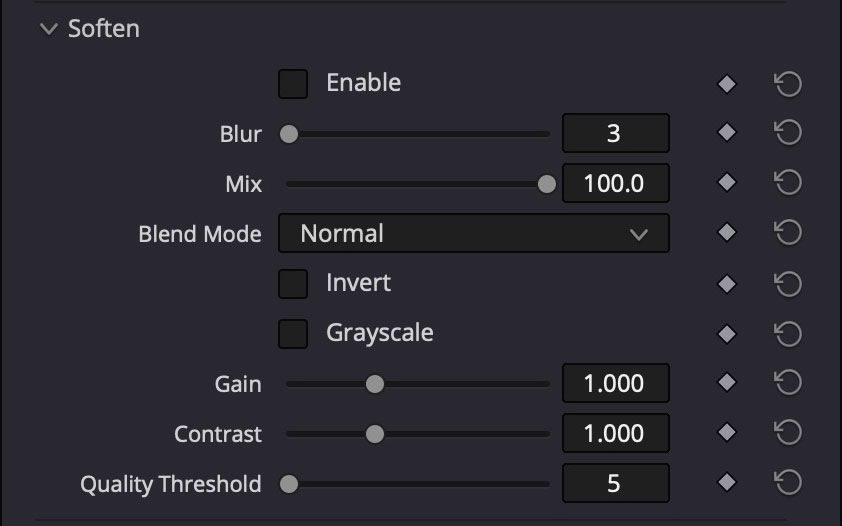
Soften
The Soften module handles diffusion and bloom. Blur sets the radius, Mix controls intensity, and Blend Mode chooses how the blur is composited (Normal, Add, Screen, etc. depending on the plugin build). Optional Invert and Grayscale toggles help turn the blur into glow or light-wrap variants. Gain, Contrast, and Quality Threshold let you fine-tune the sharpness of the blurred plate. Enable it when you want cosmetic diffusion, dreamy highlights, or a quick soft-proof pass.
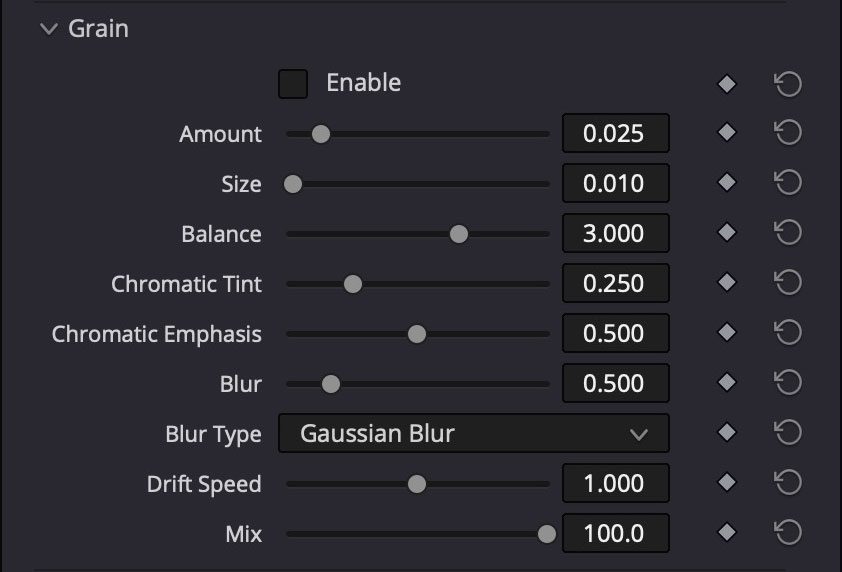
Grain
Grain adds procedural film texture with full control over aesthetics. Amount and Size define how visible the grain is, Balance shifts weight between luma and chroma, and Chromatic Tint/Emphasis determine the color of the noise. Blur and Blur Type shape the grain structure, while Drift Speed animates subtle movement for realism. Use Mix to dose the grain in, matching specific stocks or hiding compression artifacts.
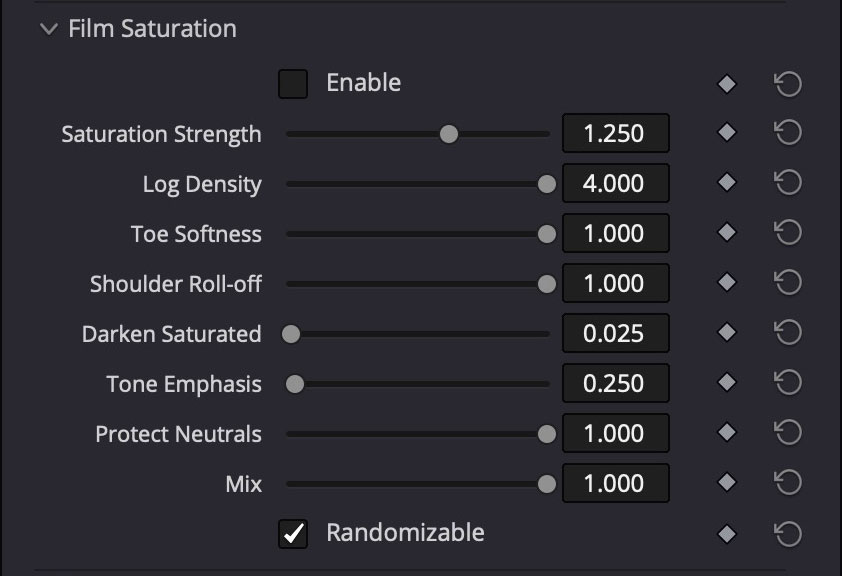
Film Saturation
Film Saturation offers film-print style saturation shaping. Instead of a simple global slider, you get controls for saturation strength, log density, toe softness, and shoulder roll-off to mimic photochemical response curves. Darken Saturated and Tone Emphasis keep highlights controlled while Protect Neutrals prevents color casts in grays. Activate Randomizable Mix when you want Seedgrade to hunt for tasteful variations that stay within your filmic bounds.
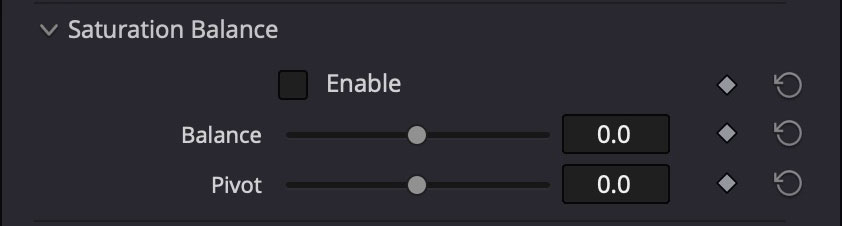
Saturation Balance
Saturation Balance is a minimal two-knob control for shifting saturation emphasis across tonal ranges. Balance biases the effect toward shadows or highlights, while Pivot sets the midpoint. Use it to subtly push color into mids while protecting highlights, or to calm down oversaturated blacks without affecting the rest of the grade.
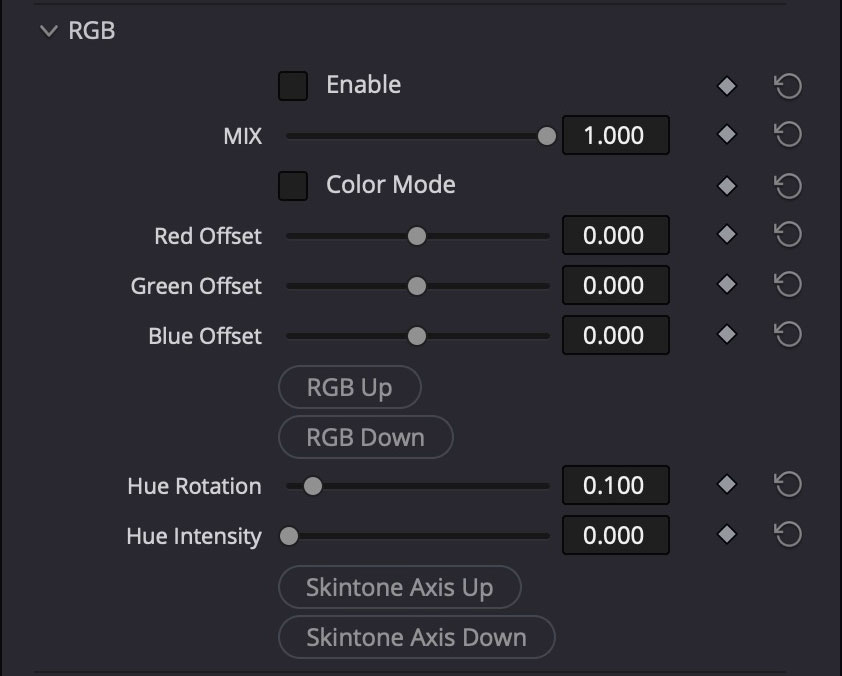
RGB
The RGB section offsets red, green, and blue channels independently for creative color shifts or channel balancing. Toggle Color Mode when you want the adjustments to happen in a perceptual color space rather than straight RGB. Hue Rotation and Hue Intensity let you swirl the entire color wheel, while the Skintone Axis buttons bias the rotation around common skin hues. This block is perfect for quick color separation, tritone looks, or nudging camera channels into alignment.
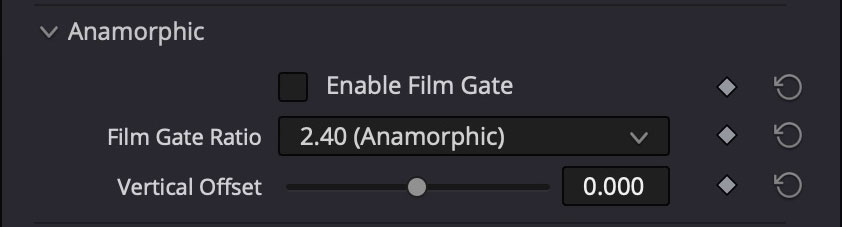
Anamorphic
Anamorphic adds a matte that simulates film gates. Choose the Film Gate Ratio (2.40, 1.85, etc.) and use Vertical Offset to reposition the crop. This is handy for previewing different delivery aspect ratios, designing titles inside safe zones, or selling the anamorphic aesthetic without leaving the grading timeline.
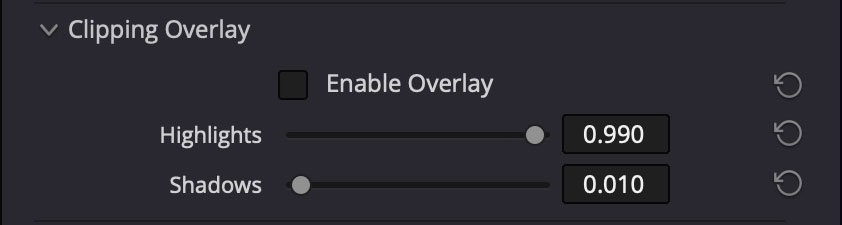
Clipping Overlay
Clipping Overlay highlights areas that are about to blow out or crush. Enable the overlay, set the highlight and shadow thresholds, and Seedgrade paints the risky regions so you can pull them back with other controls. Use it during quality control passes or when matching multiple cameras to maintain consistent exposure headroom.
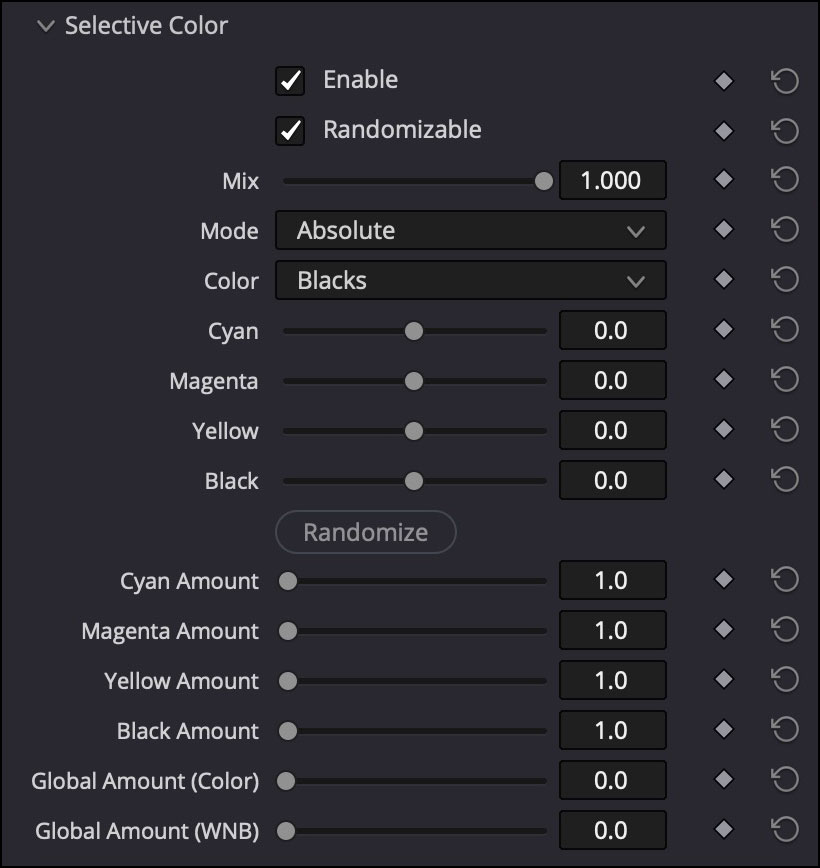
Selective Color
Selective Color provides surgical CMYK adjustments within specific tonal ranges. Choose a target Color range (Blacks, Whites, Neutrals, etc.), then shift individual Cyan, Magenta, Yellow, and Black channels with precision sliders. Mode toggles between Absolute and Relative adjustments, while the Amount sliders control how aggressively each channel is applied. Enable Randomizable to let Seedgrade explore variations, and use Mix to blend the effect. Perfect for isolating and correcting color casts in shadows or highlights, matching print aesthetics, or building complex duotone looks that target specific luminance zones.
LUT Export
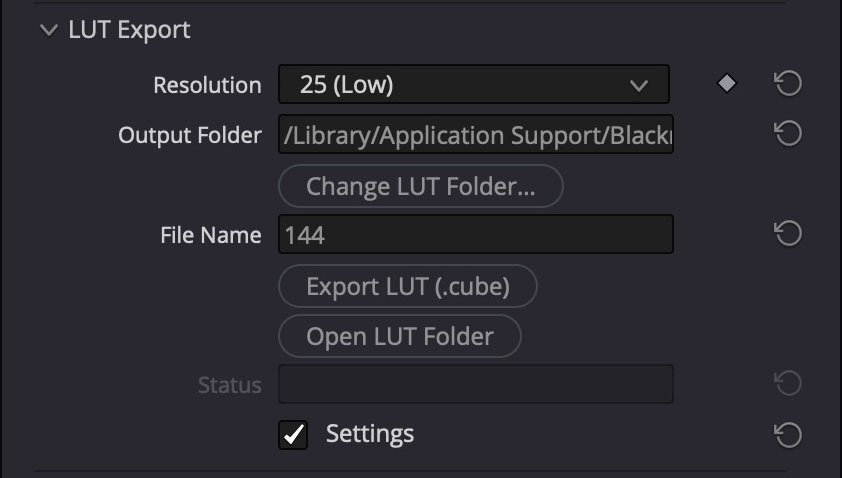
LUT Export turns your current Seedgrade setup into a portable LUT. Pick the resolution (3D LUT size), set the output folder, give the file a name, and hit Export LUT to write a .cube file that can be used in other grading apps, cameras, or on-set monitors. Open LUT Folder jumps to the export destination for quick drag-and-drop into your pipeline. Enable Settings to keep the current configuration ready for the next export batch.
Account
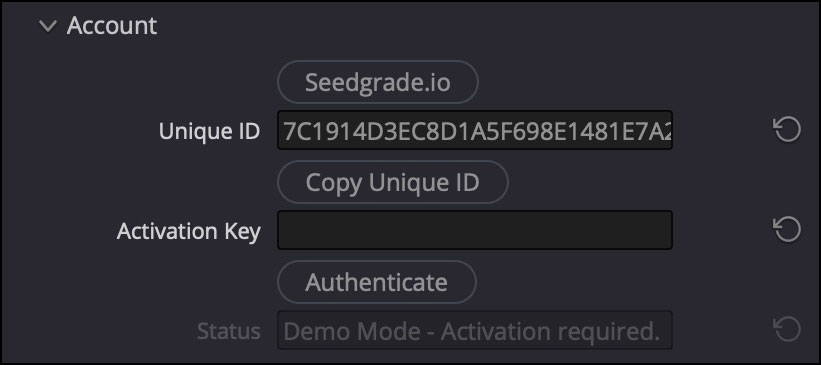
The Account panel handles offline activation for your Seedgrade license. To unlock the full version, copy your Unique ID from this panel and visit your Seedgrade.io profile page. After signing in on the website, generate an Activation Key for this workstation. Return to Seedgrade, paste the key into the Activation Key field, and click Authenticate. Once activated, Seedgrade immediately switches out of Demo Mode and all feature limits are removed. The Account panel then hides automatically, keeping your workspace clean. Use this workflow whenever you need to authorize a new workstation or refresh a license offline.
Utilities
Utilities contains the emergency kill switch. Hit Disable All Effects to bypass every module in the stack instantly—ideal for troubleshooting render issues, checking the original footage, or exporting a clean plate without removing the plugin.
